Leaderboard


Popular Content
Showing content with the highest reputation since 04/17/2014 in Posts
-
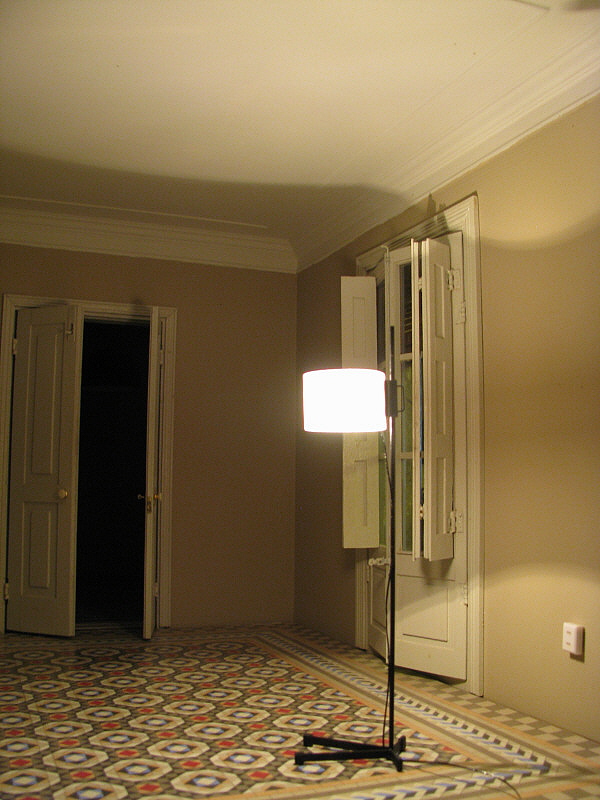
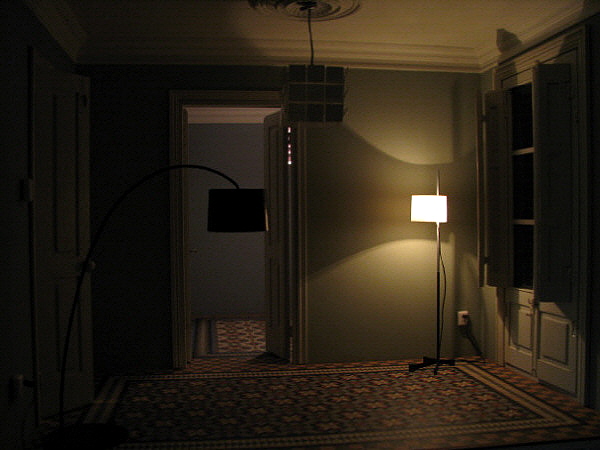
Hello to everybody, I have open this new topic in order to talk about the importance of light in our miniature houses and structures. I'm not going to talk about sophisticated setups which try to reproduce optical illusions in our scenes. This is quite common in dioramas and the techniques that we use are closer to theatrical scenery rather than architecture. What I want to show you is how we can change a room only playing with light as if it was a real one, that is, with natural light that goes through a window and artifical light of our lamps. I use modern lights. the modern light's designer is not only worried about the shape of the lamp, or the materials he use, but also for the kind of light he want to show: direct, indirect, diffuse, intense, its colour, warmer or colder light, and this give us many possibilities. I have boxed the room that will serve to explain what I mean. the first photo shows the room lighted by the sunlight that goes through the window. the second one, the same sunlight but filtering through the blinds the next one is dark and the light enters through another room the fourth is lighted by a "cubrik" lamp (Antoni Arola in 2005, for Santa e Cole) the fifth, by a "twiggy" ( Marc Sadler in 2006 for Foscarini) the sixth, "TMC", a very famous design made by Miguel Milà in 1961 the seventh, both "twiggy" and "TMC" finally all lights togethe http://www.artmajeur.com/miniarquitect


 5 points
 -
I am venturing on a new project. Simmy from UK, former member of the late Scale Model Horse Drawn Vehicles forum, sent me a CD with tuns of photos of two different Chinese carts. He built one in 1/8th scale. I found them intriguing and decided to see if I can build one. I will be building in 1/12th. I thought that this would be an easy project, now I could build with my trembling hands. While I now have my doubts I am continuing on. I will post the build as I go.
 4 points
 -
Hello everyone. Was overseas for a year. I had no ability to stay in touch with emails and barely had access to the internet. Anyhow, I did have time to build a 1:16 scale log cabin. It is constructed in the same manner as a full scale cabin would be. Half-dovetail notches on the logs and chinking troweled on between them. I enjoyed most of the processes except applying and ageing the shingles. About 2000 of them. My next project will be something which has no shingles! The pictures are of the cabin pasted over some background image. Cheers, Guy


 4 points
 -
Elga, this progression is a shortened version of one I have on another forum. That reference was from about six years ago. If I calculate correctly I am in my 12h or 13th year on this project. It is a very complicated project requiring time to learn and develop methods of producing the parts. As Bill said it sometimes takes more time to develop jigs and fixtures that it dose to make the part from them. Developing the glass beveler took several months of research and trying to build a machine to do it on. While back in Kansas City to teach a study program, Bill took me to a lapidary shop where I found this machine. I bought it and had it shipped back to Oregon then had to figure how to convert it for beveling glass. I had to make it so that the angle could be adjusted to accommodate different sizes of windows. Thank you all for your comments. Following this forum is encouraging me to try to get back at it.4 points
-
This is how I go about making the decorative metal parts such as the sun burst and now the C details, for the popcorn wagon, from nickel silver stock. (1) The parts are drawn up to scale and glued to the metal with spray adhesive. (2) They are then sawn out using a jeweler's saw (I am using a #1 blade here) Use Burr-life or bees wax on the blade for lubrication. (3) The shape is filed to contour. I use files as as I have more control; a power burr can grab and ruin the whole thing. Once it is filed to rough shape I finish shaping using rubber polishing tools in a power hand piece. (5) Once the part is polished to final shape it is buffed to as high shine with compound.4 points
-
PART 3: MAKING THE WHEELS This is the rear wheel of a popcorn wagon that is being restored by Pearson's The thing in the hub is a hub nut wrench, the wheel was being removed at that time. Look closely and you can see the brake hub and brake assembly on the back side of the wheel. The model rear wheel from the back showing the brake drum and working and adjustable brake band assembly.(more about that brakes later) The model wheel.4 points
-
Jumping ahead for a sneak preview of things come. These are the main parts of the cart less one wheel which is still under construction. Every thing is kind os stacked together in these pictures. Once the last wheel is done I will be going to the metalwork to finish it off.
.jpg.8c953cd72f3999cce4a1ffaa6e4ed839.jpg)
.jpg.a0ffcec35de5c3f638d23511f1f3bc01.jpg)
 3 points
 -
Thanks for the compliments Bill, I think trying to figure out how to do it is more fun than actually doing it much of the time. It took me several attempts just to figure pout the template for drill int the segment holes. Once I got the fixture set up drilling the holes was just taking the time to drill all 500 + holes. The biggest problem was keeping the holes aligned as the tiny drill wanted to wander when it hit hard grain. I solved much of this by starting the hole with a center drill first. I can only work about an hour or so each day so it took me much of a week to drill all the holes. Same to for turning own the nail heads. My lathe is set up for that and locked in position. so ever once in a while when I need something to do I set down at the lathe and turn nails. I'm about 1/3 of the way in finishing the nails.
 3 points
 -
Developing the tires. On the original the tire is made up of six individual sections and nailed on to the wheel. to make it simpler for me I rolled and silver soldered the joint of a main tire. I then made each individual section which I some soldered and riveted in place. Each of the cleats were filled out to look rough. This is the point I am on th is project.

.thumb.jpg.16d7f46d402dafeb5d98a5aeebaf8365.jpg)
.jpg.8998122020400b9c4c7618d57d73edbf.jpg) 3 points
3 points -
Here is the Colman House, it is the largest in the collection Factory made toy houses One of the many doll cases, keep in mind all these photos only show a fraction of the collection on display There are cases by each decade to bring toys up to our time, to me the 50's and 60's cases were like a 3-d trip through the Sears Christmas catalog. I also find it somewhat strange that things I owned brand new are in a museum…… there is just something wrong with that concept….. but I loved it. There is a large exhibit called Toys in the Attic with just all kinds of stuff Many of the pieces have great histories, some of which have wonderful video programs to explain them3 points
-
My lights are much better with the LEDs added, but I sure can't get a decent photo of the room with the lights on, I tried during the day and in the dark, and if the scene isn't yellowed it's overpowered by the bright light glare. It's not the type of photo I've ever had to take before now, but suffice to say the scene looks much better than before and this photo might indicate. The LED bulbs are behind the walls, the chandelier and table lamp are normal bulbs3 points
-
Back to the service window rail standoffs. This is a phto of the rail below the service window. This is the start of the standoffs for the service window rail. It runs across the bottom of the large service window at the rear side of the wagon. There are six standoffs made but I only need three so I can make a mistake or two. Look closely at the center picture you can see how I place the pallion (silver solder chip) before heating. I first lightly brush the chip with a light flame until the flux liquifies then I heat to melt the solder at the joint. The last picture is of that joint after the solder has filled the joint. Just to be safe I flip the unit over to make sure the solder filled the joint on the back side. These stand offs will be longer and bent much like the seat bracket. The chips are down. Here I have fluxed and set the solder chips ready for the gang soldering the stand off bases in place. Here the standoffs have been bent and cut off, they are strung on a rod for safe keeping. NOTE: these are not made of copper the red color is what happens when you let your steel tweezers get into the pickle solution when quenching the work. It doesn't hurt any thing and will polish off. Ah ha caught him! Have you ever had some part just disappear from your bench while you are working and then find it later after you go to the trouble of making another one? Have you seemingly had a tool just walk off your bench while you are working? Well this is one of the little critters you can blame. Normally you can't see them with the naked eye but the camera can catch them. These are three of the finished standoffs. They are ready to be cut from the work stock and have the threaded studs installed. (will probably not do that until after they are plated). I knew there was a reason to make extra standoffs besides just making spared. There is a smaller service window with rail using two standoffs on the back side of the wagon. __________________3 points
-
To put this model into a little perspective. Below is some, note I say some, of the research material involved in developing the popcorn wagon.3 points
-
3 points
-
Amazing! I hope everyone reading this realizes you are looking at YEARS of work here.... It is kind of funny reading this.... Sort of like you just make this part, then this and tomorrow this other thing. You have to realize all the jigs and fixtures you see also had to be made, things to bend springs, modify the glass beveled by machining out that aluminum table, etc... The list goes on and on! Years of incredible highly skilled work...... A true labor of love.3 points
-
The Brake System: The brake leaver is constructed from nickel silver flat stock, It works. Could not find a proper spring in scale so it works on a torsion process to operate the latch dog. The correct notches will be fitted in the arc when I finish the brake system. This is one rear wheel with the brake drum out side brake band and mechanism and the bracket that attaches to the rear spring which holds the brake band in place. Note the 1/32' hex nuts inside the brake drum. The brake drum, brake band (it is adjustable by turning the little cylinder under the yoke) and mounting bracket which will clamp on the spring. This is the brake drum and brake band mounted (off the wheel) to the bracket that is attached to the main wagon springs. The complete brake system for the brake leaver side. The short leaver sticking down about mid length is connected to a shaft that runs under the wagon to a similar brake system for the other side.3 points
-
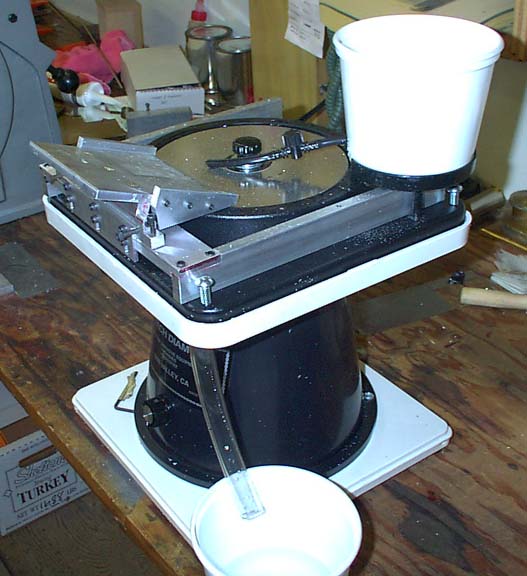
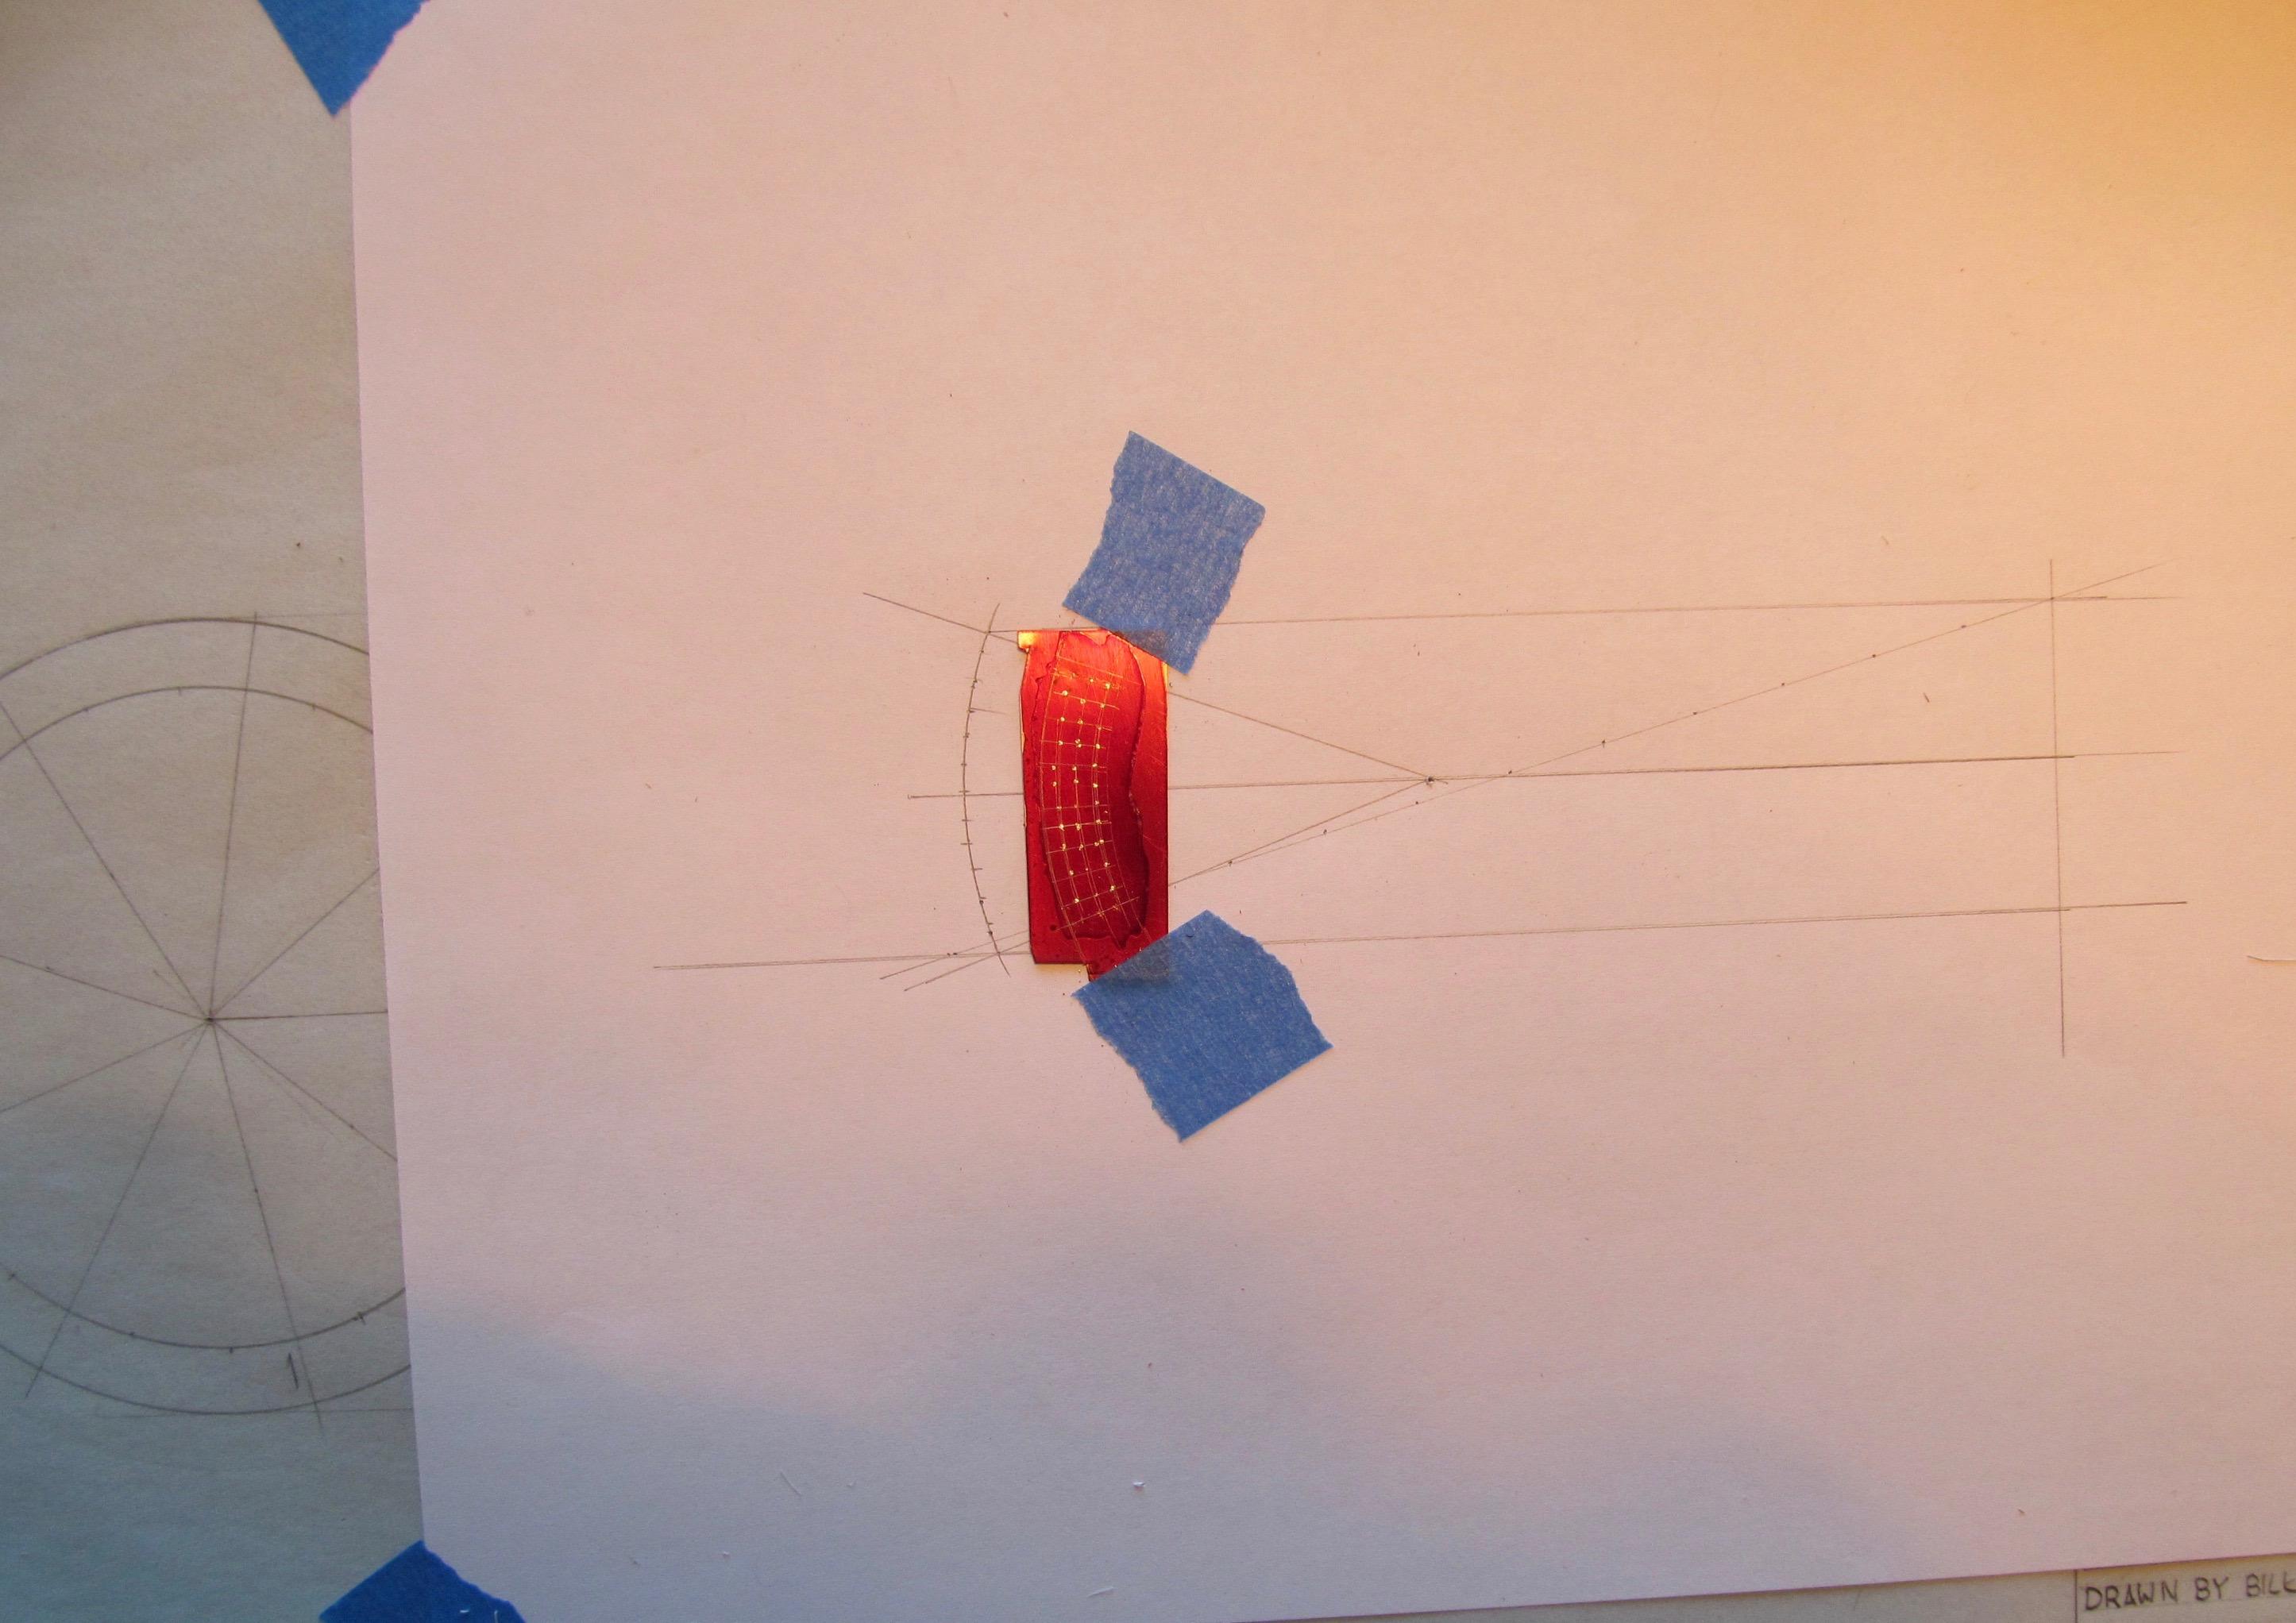
TIME OUT: a little bit on beveling glass. This is what I use for beveling glass. It is made for lapidary work. i have added the table and frame to it. The table tilts up and is adjustable in all directions. The upper tub is filled with water the flow of which is controlled by a valve on the black hose. A light film is kept on the wheel to wash away the grindings. The waste water flows into the lower tub. I use several grits of diamond starting out with 180 and finishing up with 2500 These are the two signs for the side of the wagon. If you look closely you can see the bevel in the glass. They have nickel frames around them. These are my windows and frames for the wagon. Although hard to tell in this picture all the glass is beveled. The tape is to protect the glass from scratching while in storage.


 3 points
 -
A LITTLE CHANGE OF PACE FROM THE REDUNDANT. This is a picture of the full size shelf bracket in the popcorn wagon. It holds up the shelf for the clown. These are some of the decorative brackets for the popcorn wagon. They are larger in this picture than actually. the one on the left is the shelf bracket. Sorry the shadow sort of hides the detail. These brackets were sawed out with a very fine Jewelers saw blade. Then they were carved with a file from brass and then nickel plated. The sun brackets go above the driver seat. The lower brackets are the seat front legs. This is the latest photo of the clown shelf bracket finished and ready to mount in the wagon3 points
-
Turning the rubber tires for the popcorn wagon. Below are views of my wheel turning fixture and how it is mounted in the lathe chuck. The plywood backing is sacrificial and can be replaced when it is unusable. I decided to make the tires the same way I make the felly blanks only using ABS plastic to simulate the rubber. I am not too fond of O rings as they crack and fail over time. The next two pictures are of the rough cut ABS blanks with double stick carpet tape applied to one. Next is the blanks being turned to the OD of the large wheel tires. After the tire blanks were turned to the correct ID they were mounted back on the wheel fixture over a thin core of the OD of the wooden wheel. A retaining cap was turned to the OD of the metal tire rim. This is clamped on with the thumb nut. This acts as a guide to turn the rubber tire portion. I removed 1/64"of material to form the tire. The tire was then finished off on this side with files and sandpaper. Then the ring was flipped over and the whole process was done on the other side. The simifinished tire is mounted, Temp., on the wood wheel. It will eventually be sanded out to a better finish then I will use my air eraser to sand blast the rubber part for some texture. The metal rim will be painted black. The tires on the popcorn wagon are slightly tapered (flat) on the sides with a slight rounding off on the edges. The tire face is also flat rather than rounded so O rings would not look correct.3 points
-
PART 1 This is where it all started in 1969. Found this hulk sitting out in a field. Started research and found pictures of three different popcorn wagon in Eugene in the same area of 1910. The one with the horse is the nicest. I went back later to see if I could buy the hulk with the thought of restoring it but the lady wouldn't sell it. It finally rotted into the ground, nothing really salvageable. A little research at our local museum brought up these two photographs. After that the trail went dead and I had pretty much forgotten it.


 3 points
 -
Since we are a world wide community it would be fun to see where we are each from. If you missed this when you registered it is easy to fix. When you are logged in go up to the black bar where one thing from the right end you will see your name, click on that and box will open with a bunch of things, go to "my profile" and click. It will open a page with your details on it, you will see a red box in the upper right white space called "Edit my Profile", click there, it will open a list of all kinds of things to add to your profile…. scroll down and next to the bottom is "location", just fill that in and click the box below it called "Save Changes"…. that's all there is to it…. then next to your name will be where you are from. Now I know folks like to not put out too much information on the internet, keep in mind if someone wants to find you they already can. But if you don't want to put you city and state, maybe just your region like New England. If you live in a small country maybe just the country like Denmark, or you could say Scandinavia or Northern Europe. Please put something, it will just add to fun. Thank You.3 points
-
@WeekendMiniaturist The tool I use to age shingles is pretty simple. It is a cut-off wheel attached to a Foredom rotary tool. I use a cut-off wheel because it cuts a very fine line. I just randomly course the wheel over the shingles. I then float a dark grey wash over all the shingles and selectively darken some with Copic markers. Cheers, Guy
 2 points
 -
Here are some more photos of the miniature areas, again sorry for the poor quality, these were taken with my iPad and it too just doesn't like the lighting, it either wants to make the picture too bright or too dark…. In the hall are a number of cases of miniature toys... This shelf includes some of Bill Hudson's fantastic pieces like the pedal car fire truck, scooter and tricycle. Here is the first thing you see when you enter the miniature gallery, a paneled wall, completely washed out in the photo, with a full scale chair, table and sampler and the same in 1/12th scale. The maze is a dark hall filled with miniature rooms, at the entrance is Pat & Noel Thomas's Green & Green house fragment. And my Architect's Classroom is still there…. some folks were worried when they didn't see it in the photos. Here is the back hall of the maze, featuring some 1/2" scale work.2 points
-
I forgot to take any pictures in the maze, a hallway of miniature rooms or the Southwestern Room This is the new Artists Workshop, a interactive gallery that shows how miniatures are made. Lee Ann Wessel and myself are the sub jets of 4 vies showing how we machine brass candlesticks, cut dovetails, do egg temper painting and making a ceramic dish. All the tools you see in the videos are displayed in the cases so people can really get a true idea of how this is done. Other exhibits show work in progress. So that is your short little tour of one of the most amazing places on the planet to see the kind of miniatures we all like.2 points
-
hello, at the beginning of this post I said that I was used to illuminate my houses with modern lamps because you can create different atmospheres in miniature rooms. Here, you have an example of the same corner of a sitting-room and the effect in it of five different lamps.


 2 points


.jpg.8c953cd72f3999cce4a1ffaa6e4ed839.jpg)
.jpg.a0ffcec35de5c3f638d23511f1f3bc01.jpg)


.jpg.a1549deceb2f90164add18a095dbdca9.jpg)
.jpg.8998122020400b9c4c7618d57d73edbf.jpg)